Let me show you how to go about configuring the above mentioned setup.
With these steps, you can install multiple web-based application containers running under Nginx with each standalone container corresponding to its own respective domain or subdomain.
First, let's see what you need in order to follow this tutorial.
You'll be needing the following knowledge to get started with this tutorial easily. Althogh, you can get by without them as well.
I have used domain.com as an example domain name in the tutorial. Please make sure you change it according to your own domains or subdomains.
Other than the above, please also make sure of the following things:
Change your domain’s DNS records
In your domain name provider’s A/AAAA or CNAME record panel, make sure that both the domain and subdomains (including www) point to your server’s IP address.
This is an example for your reference:
| Hostname | IP Address | TTL |
|---|---|---|
| domain.com | 172.105.50.178 | Default |
| * | 172.105.50.178 | Default |
| sub0.domain.com | 172.105.50.178 | Default |
| sub1.domain.com | 172.105.50.178 | Default |
Swap space
To make sure all your container apps are at ease and never run out of memory after you deploy them, you must have the necessary swap space on your system.
You can always adjust swap according to the available RAM on your system. You can decide the swap space based on the bundle of app containers on the single server and estimating their cumulative RAM usage.
Start with setting up your nginx reverse proxy. Create a directory named "reverse-proxy" and switch to it:
mkdir reverse-proxy && cd reverse-proxy
Create a file named docker-compose.yml, open it in your favourite terminal-based text editor like Vim or Nano.
For the nginx reverse proxy, I'll be using jwilder/nginx-proxy image. Copy and paste the following in the docker-compose.yml file:
version: "3.7"

services:

    reverse-proxy:
        image: "jwilder/nginx-proxy:latest"
        container_name: "reverse-proxy"
        volumes:
            - "html:/usr/share/nginx/html"
            - "dhparam:/etc/nginx/dhparam"
            - "vhost:/etc/nginx/vhost.d"
            - "certs:/etc/nginx/certs"
            - "/run/docker.sock:/tmp/docker.sock:ro"
        restart: "always"
        networks:
            - "net"
        ports:
            - "80:80"
            - "443:443"
Now let's go through the important parts of the compose file:
html & vhost volumes will be very important in the next Let's Encrypt container deployment. They're designed to work together.always. Other options include on-failure and unless-stopped. In this case, always seemed more appropriate.Using a user defined network is very important. This will help in isolating all the containers that are to be proxied, along with enabling the reverse proxy container to forward the clients to their desired/intended containers and also let the containers communicate with each other (Which is not possible with the default bridge network unlessiccis set totruefor the daemon).
Keep in mind that YML is very finicky about tabs and indention.
For this, you can using jrcs/letsencrypt-nginx-proxy-companion container image.
On the same docker-compose.yml file that you used before, add the following lines:
    letsencrypt:
        image: "jrcs/letsencrypt-nginx-proxy-companion:latest"
        container_name: "letsencrypt-helper"
        volumes:
            - "html:/usr/share/nginx/html"
            - "dhparam:/etc/nginx/dhparam"
            - "vhost:/etc/nginx/vhost.d"
            - "certs:/etc/nginx/certs"
            - "/run/docker.sock:/var/run/docker.sock:ro"
        environment:
            NGINX_PROXY_CONTAINER: "reverse-proxy"
            DEFAULT_EMAIL: "[email protected]"
        restart: "always"
        depends_on:
            - "reverse-proxy"
        networks:
            - "net"
In this service definition:
html and vhost volumes sharing are necessary for the ACME Challenge of letsencrypt to be successful. This container will generate the certificates inside /etc/nginx/certs, in the container. This is why you are sharing this volume with your reverse proxy container. The dhparam volume will contain the dhparam file. The socket is mounted to detect other containers with a specific environment variable.NGINX_PROXY_CONTAINER variable points to the reverse proxy container. Set it to the name of the container. The DEFAULT_EMAIL is the email that'll be used while generating the certificates for each domain/subdomain.depends_on option is set so that this service waits for the reverse proxy to start first, then and only then, this'll start.Once the service definitions are done, complete the docker-compose file with the following lines:
volumes:
  certs:
  html:
  vhost:
  dhparam:

networks:
  net:
    external: true
The network net is set to external because the proxied containers will also have to use this network. And if we leave the network to get created by docker-comspose, the network name will depend on the current directory. This will create a weirdly named network.
Other than that, other containers will have to set that network to be external anyway, otherwise those compose files will also have to reside in this same directory, none of which is ideal.
Therefore, create the network using
docker network create netThe following is the whole content of the docker-compose.yml file.
version: "3.7"

services:

    reverse-proxy:
        image: "jwilder/nginx-proxy:latest"
        container_name: "reverse-proxy"
        volumes:
            - "html:/usr/share/nginx/html"
            - "dhparam:/etc/nginx/dhparam"
            - "vhost:/etc/nginx/vhost.d"
            - "certs:/etc/nginx/certs"
            - "/run/docker.sock:/tmp/docker.sock:ro"
        restart: "always"
        networks:
            - "net"
        ports:
            - "80:80"
            - "443:443"
    letsencrypt:
        image: "jrcs/letsencrypt-nginx-proxy-companion:latest"
        container_name: "letsencrypt-helper"
        volumes:
            - "html:/usr/share/nginx/html"
            - "dhparam:/etc/nginx/dhparam"
            - "vhost:/etc/nginx/vhost.d"
            - "certs:/etc/nginx/certs"
            - "/run/docker.sock:/var/run/docker.sock:ro"
        environment:
            NGINX_PROXY_CONTAINER: "reverse-proxy"
            DEFAULT_EMAIL: "[email protected]"
        restart: "always"
        depends_on:
            - "reverse-proxy"
        networks:
            - "net"
volumes:
  certs:
  html:
  vhost:
  dhparam:

networks:
  net:
    external: true
Finally, you can deploy these two containers (Ngnix and Let's Encrypt) using the following command:
docker-compose up -d
The container that'll serve the frontend will need to define two environment variables.
VIRTUAL_HOST: for generating the reverse proxy config
LETSENCRYPT_HOST: for generating the necessary certificates
Make sure that you have correct values for these two variables. You can run nginx-dummy image with reverse proxy like this:
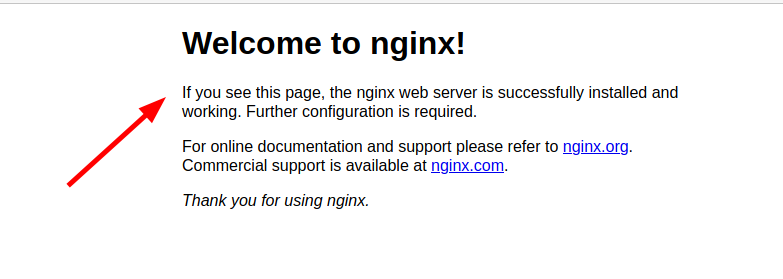
docker run --rm --name nginx-dummy -e VIRTUAL_HOST=sub.domain.com -e LETSENCRYPT_HOST=sub.domain.com -e VIRTUAL_PORT=80 --network net -d nginx:latestNow if you go to your sub-domain used in the previous command, you should see a message from Ngnix server.
Once you have successfully tested it, you can stop the running docker container:
docker stop nginx-dummyYou may also stop the Ngnix reverse proxy if you are not going to use it:
docker-compose downThe process of setting up other containers so that they can be proxied is VERY simple.
I'll show it with two instances of Nextcloud deployment in a moment. Let me first tell you what you are doing here.
The container can leave out the port that serves the frontend. The reverse proxy container will automatically detect that.
If the reverse proxy container fails to detect the port, you can define another environment variable named VIRTUAL_PORT with the port serving the frontend or whichever service you want to get proxied, like "80" or "7765".
You can override the DEFAULT_EMAIL variable and set a specific email address for a specific container/web service's domain/subdomain certificate(s), by setting the email id to the environment variable LETSENCRYPT_EMAIL. This works on a per-container basis.
Now that you know all those stuff, let me show you the command that deploys a Nextcloud instance that'll be proxied using the nginx proxy container, and will have TLS(SSL/HTTPS) enabled.
This is NOT AN IDEAL deployment. The following command is used for demonstrative purpose only.
docker run --name nextcloud --network net -e VIRTUAL_HOST="sub0.domain.com" -e LETSENCRYPT_HOST="sub0.domain.com" -d nextcloud:19.0.2
In the example, you used the same network as the reverse proxy containers, defined the two environment variables, with the appropriate subdomains (Set yours accordingly). After a couple of minutes, you should see Nextcloud running on sub0.domain.com. Open it in a browser to verify.
You can deploy another Nextcloud instance just like this one, on a different subdomain, like the following:
docker run --name anothernextcloud --network net -e VIRTUAL_HOST="sub1.domain.com" -e LETSENCRYPT_HOST="sub1.domain.com" -d nextcloud:19.0.2
Now you should see a different Nextcloud instance running on a different subdomain on the same server.
With this method, you can deploy different web apps on the same server served under different subdomains, which is pretty handy.